Bitbucket Repositories
Review Board supports posting and reviewing code on Bitbucket repositories.
The following types of Bitbucket repositories are supported:
- Git
- Mercurial
To simplify posting changes to Review Board, we recommend using RBTools. This ensures that the diffs are in the correct format, and makes managing review requests much easier.
Adding the Repository
To configure a Bitbucket repository, first proceed to add the repository and select Bitbucket from the Hosting type field.
Step 1: Link Your Bitbucket Account
You will need to link an account on Bitbucket to Review Board, so that Review Board can access content from the repository. If you’ve already linked an account with sufficient access to the repository, you can use that instead. Otherwise, you will need to supply credentials in the Account username and Account password fields.
For the Account username field, use your configured Bitbucket username (found in your Bitbucket account settings) and not your Bitbucket/Atlassian e-mail address. The latter will not work.
You can use your standard Bitbucket/Atlassian password for the Account password field, or you can use a Bitbucket app password password. We recommend using an app password for enhanced security. This is also required if you have two-factor authentication enabled for your Bitbucket account (which we also recommend).
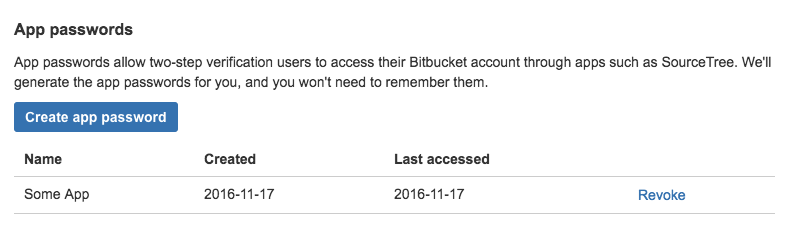
To create an app password, visit your Bitbucket app passwords page and click Create app password.
Configure your app password as follows:
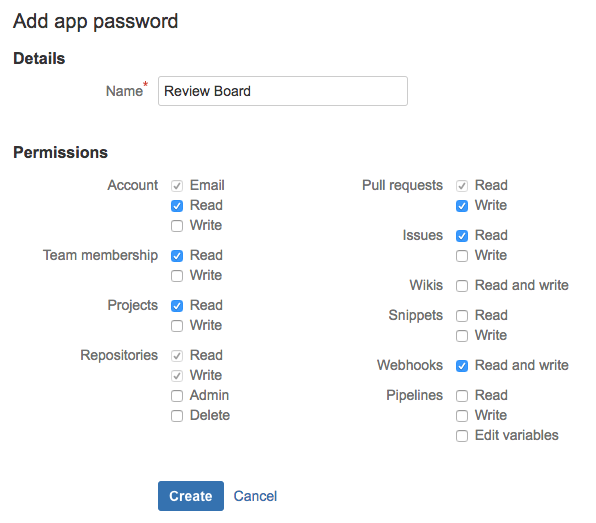
Click Create. You’ll receive an app password. Supply this in the Account password field in Review Board.
The account will be linked when the repository is saved. If there are errors authenticating the user or retrieving an access token, you will be prompted to fix them.
Step 2: Provide Repository Information
Next, you’ll need to specify the type of repository in the Repository type field. This can be either “Mercurial” or “Git”.
You’ll then choose the repository plan. This is one of the following choices:
- Personal:
- The repository is owned by the linked user account. You’ll need to provide the repository name, but nothing else.
- Other User:
The repository is owned by another user account. You’ll need to provide the username of the user and the repository name.
Note that your user will need to have access to this repository.
This option was added in Review Board 2.5.8. If you’re using a previous version, you can select “Team” instead and provide the user’s username in place of the team name.
- Team:
The repository is owned by a Bitbucket team. You’ll need to provide the team name and repository name.
Note that your user will need to have access to this team and repository.
For the Repository name field, use the name as shown in the URL.
For example, if your repository URL is
https://bitbucket.org/myteam/myrepo/, your repository name would be
myrepo.
Step 3: Choose a Bug Tracker
If you’re using the issue tracking feature on this repository, you can simply check the Use hosting service’s bug tracker checkbox. All bug IDs will link to the appropriate issues for your repository.
If you’re using a separate bug tracker, or a separate repository on Bitbucket, you can leave the checkbox unchecked and choose a bug tracker from the list.
Step 4: Manage Access Control
You can now choose who should have access to this repository (both posting against it and viewing review requests posted against it). This is separate from Bitbucket’s own access controls.
Step 5: Save the Repository
At this point, you should be able to save the repository. If saving succeeds, you’re done! You can start posting changes for review.
Configuring Repository Hooks
Review Board can close review requests automatically when pushing commits to Bitbucket. This is done by configuring a WebHook and pointing it to your Review Board server, and then referencing the review request in your commit message (which is done for you when using rbt land).
Let’s go over how to set this up.
Note
Your Review Board server will need to be accessible over the Internet for this to work. Bitbucket will be performing HTTP/HTTPS requests to your server to notify Review Board of new commits.
Add the WebHook
On Review Board, view the list of repositories and locate the repository you want to configure hooks for. Beside the repository name, you’ll see a Hooks link. Click that and you’ll see instructions for configuring the hook.

At the bottom of the instructions is a link for creating the WebHook. Click that and follow the instructions on the Bitbucket site.
Tag Your Commit Messages
To close a review request for a given commit, you’ll need to add some special
text to your commit message that references the review request. This can be in
the form of Reviewed at review_request_url or Review request
#id. This must be on its own line, but can appear anywhere in the commit
message.
For example:
Reviewed at https://reviewboard.example.com/r/123/
Or:
Review request #123
If you use rbt land, this will be automatically added for you when landing your changes.