The Review Banner
The Review Banner is always shown at the top of the review request page, diff viewer, and file attachments. It’s where you’ll create, edit, and publish reviews.
Review Menu
The Review menu is always shown on the banner, giving you options for working with your review:
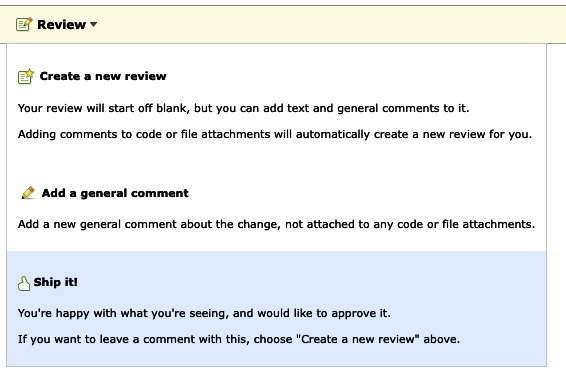
Clicking Create a new review will create a new, blank review draft.
Clicking Add a general comment will create a new General Comment about the review request, not linked to any code or file attachments.
Clicking Ship It! will immediately publish a new review, indicating your approval of the change.
Review Drafts
Just like with review requests, when you first start adding a new review or replying to an existing review, your comments are saved in a draft state. When a review or reply is a draft, it is only visible to you.
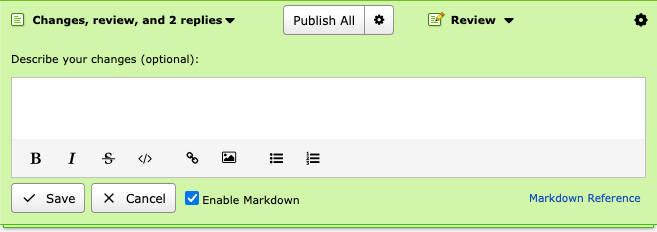
When you have a draft review, the review banner will change color to green and offer additional options.

In the Review menu, the Edit your review option will display the Review Dialog, allowing you to make changes to the review content.
Clicking Publish will publish your draft. There are also additional options available for how the change is published.
Clicking Discard will immediately discard your draft.
If you have multiple drafts (such as a review request update, a review, and replies), the banner will allow you to manage and edit all the drafts. See Managing Drafts for more detail.
Quick Access Actions
New in version 8.0.
Quick Access actions let you pin your most frequently-used review actions directly to the banner for one-click access.
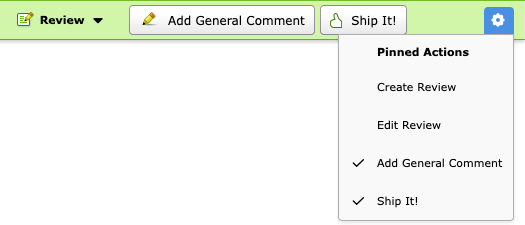
The following actions can be pinned:
Create Review
Creates a new, blank review draft. You can then add text and general comments to it. Adding comments to code or file attachments will also automatically create a new review.
Edit Review
Opens the review dialog to edit your comments and publish your review.
Add General Comment
Adds a new general comment about the change, not attached to any code or file attachments.
Ship It!
Immediately publishes a new review indicating your approval of the change.
To choose which actions are pinned, click the settings icon in the banner to open the Pinned Actions menu. Check or uncheck each action you want to show or hide. Your choices are saved automatically and persist across sessions.
Tip
Extensions can add custom Quick Access actions that your users can pin to their banner.
See Customizing the UI with Actions to learn how to write your own actions.